-
1. 更新yum 源:
yum update
2. 安装apache
yum install -y httpd
3. 查看apache 版本
httpd -v

4. 关闭防火墙 ,查看防火墙状态,重启apache
systemctl stop firewalld // 关闭防火墙
systemctl status firewalld //查看防火墙状态
systemctl restart httpd // 重启apache
5. 防火墙上开启80端口
firewall-cmd –permanent –zone=public –add-port=80/tcp //在命令行输入
systemctl start firewalld // 在上面我们关闭了防火墙,现在需要开启防火墙
6. 在浏览器输入你的ip 或绑定域名即可看到apache 默认页面
7. 安装 mysql , 依次输入以下命令
yum install wget //安装wget
wget http://dev.mysql.com/get/mysql57-community-release-el7-8.noarch.rpm //下载mysql
yum localinstall mysql57-community-release-el7-8.noarch.rpm // 安装rpm 文件
yum install mysql-community-server // 安装mysql
systemctl start mysqld //启动mysqld
grep ‘temporary password’ /var/log/mysqld.log // 查看数据库默认密码
mysql -u root -p //进入数据库
Enter password: 输入你的密码
set password for ‘root’@’localhost’=password(‘Lyw@666666’); // 设置新密码
exit; //输入exit; 回车 退出mysql

8. mysql 自启动
systemctl enable mysqld
systemctl daemon-reload
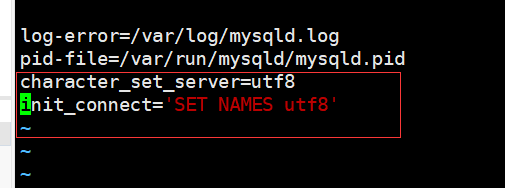
vim /etc/my.cnf //设置数据的默认字符集(非必须的)
//将下面两行配置代码加入到my.cnf最后面
character_set_server=utf8
init_connect=’SET NAMES utf8′
然后 退出保存 !
9. 重启MySQLsystemctl restart mysqld
进入mysql 数据库
select version(); //查看版本
show variables like ‘%character%’; // 查看字符集

10 . 安装php7
1> 安装依赖文件:
yum install gcc-c++ libxml2 libxml2-devel openssl openssl-devel bzip2 bzip2-devel libcurl libcurl-devel libjpeg libjpeg-devel libpng libpng-devel freetype freetype-devel gmp gmp-devel libmcrypt libmcrypt-devel readline readline-devel libxslt libxslt-devel
2> rpm -Uvh https://mirror.webtatic.com/yum/el7/epel-release.rpm //输入命令
3> rpm -Uvh https://mirror.webtatic.com/yum/el7/webtatic-release.rpm //输入命令
4> yum install mod_php71w php71w-mysqlnd php71w-cli php71w-fpm //安装php7最新版
5> 查看php 版本
php -v //输入命令

11. 配置apache : cd 到 httpd.conf 目录
1> cd /etc/httpd/conf // 输入命令

2> 复制一份作为备份:
cp -r httpd.conf httpd.conf.bak
12. 编辑测试文件
cd /var/www/html/ //进入文件目录
vim index.php // 编辑文件
编写内容
<?php
phpinfo();
?>
保存退出

13. 浏览器输入ip 或域名
